Table of Contents
- Data Merge or Mail Merge
- What is Data Merge InDesign, and what is it for
- What do I need to use Data Merge?
- Data Merge InDesign Tutorial for Adobe InDesign 2024
- Preparing the data source
- Mapping the Fields
- Creating the Merged Document
- Does Data Merge InDesign have any Limitations?
- InDesign or InDesign Server?
- How to use Data Merge InDesign to Create Business Cards?
- How to use Data Merge InDesign for Infographics?
- How to use Data Merge InDesign to Create a Planner?
- How to use Data Merge InDesign to Create Communication Tools?
- Data Merge InDesign for Personalized Envelope
- Special Characters for Playing Cards with Data Merge InDesign
- Real Estate Flyers with Data Merge InDesign
- Resources
Data Merge InDesign: Best InDesign Data Merge Tutorial
Have you ever transformed your data into a document with a precise layout? Normally, this process is quite time-taking. It requires the user to copy and paste from the data source to the chosen software to create the document. But Data Merge InDesign makes this hefty task easier.
Adobe InDesign and InDesign Server are the ultimate graphics programs for automating document creation. Their Data Merge InDesign feature speeds up this task. The Data Merge InDesign tutorial helps you learn the basics of InDesign. Do check out our Data Merge InDesign Data API as well.
This page will cover every aspect of Data Merge InDesign and tell you:
- how to do Data Merge in InDesign;
- our Data Merge InDesign Tutorial and
- InDesign Data Merge Limitations.
Data Merge or Mail Merge
So what exactly does the term “Data Merge” mean? Mail Merge is another name used for Data Merge. Mail Merge creates personalized emails, letters, envelopes, and labels with the recipient’s information. InDesign Mail Merge is a specific Data Merge InDesign feature for merging a data source with an InDesign document.
What is Data Merge InDesign, and what is it for
Data Merge InDesign allows you to transfer determinate information from your file data into an InDesign document. Moreover, it enables you to create multiple variations of this document. First, you choose the desired fields of the InDesign document. Then, they are populated with the corresponding information from your data source. This process is automatic. In fact, you won’t need to copy the data from the source to the new document by hand.
Data Merge InDesign is generally used to create documents in which data is repeated. Data is structured in a similar way across the whole document (If you want to use multiple product templates, read this). Data Merge InDesign is frequently used to create documents with a simple and repetitive layout, like business cards, simple brochures, badges, and so on.
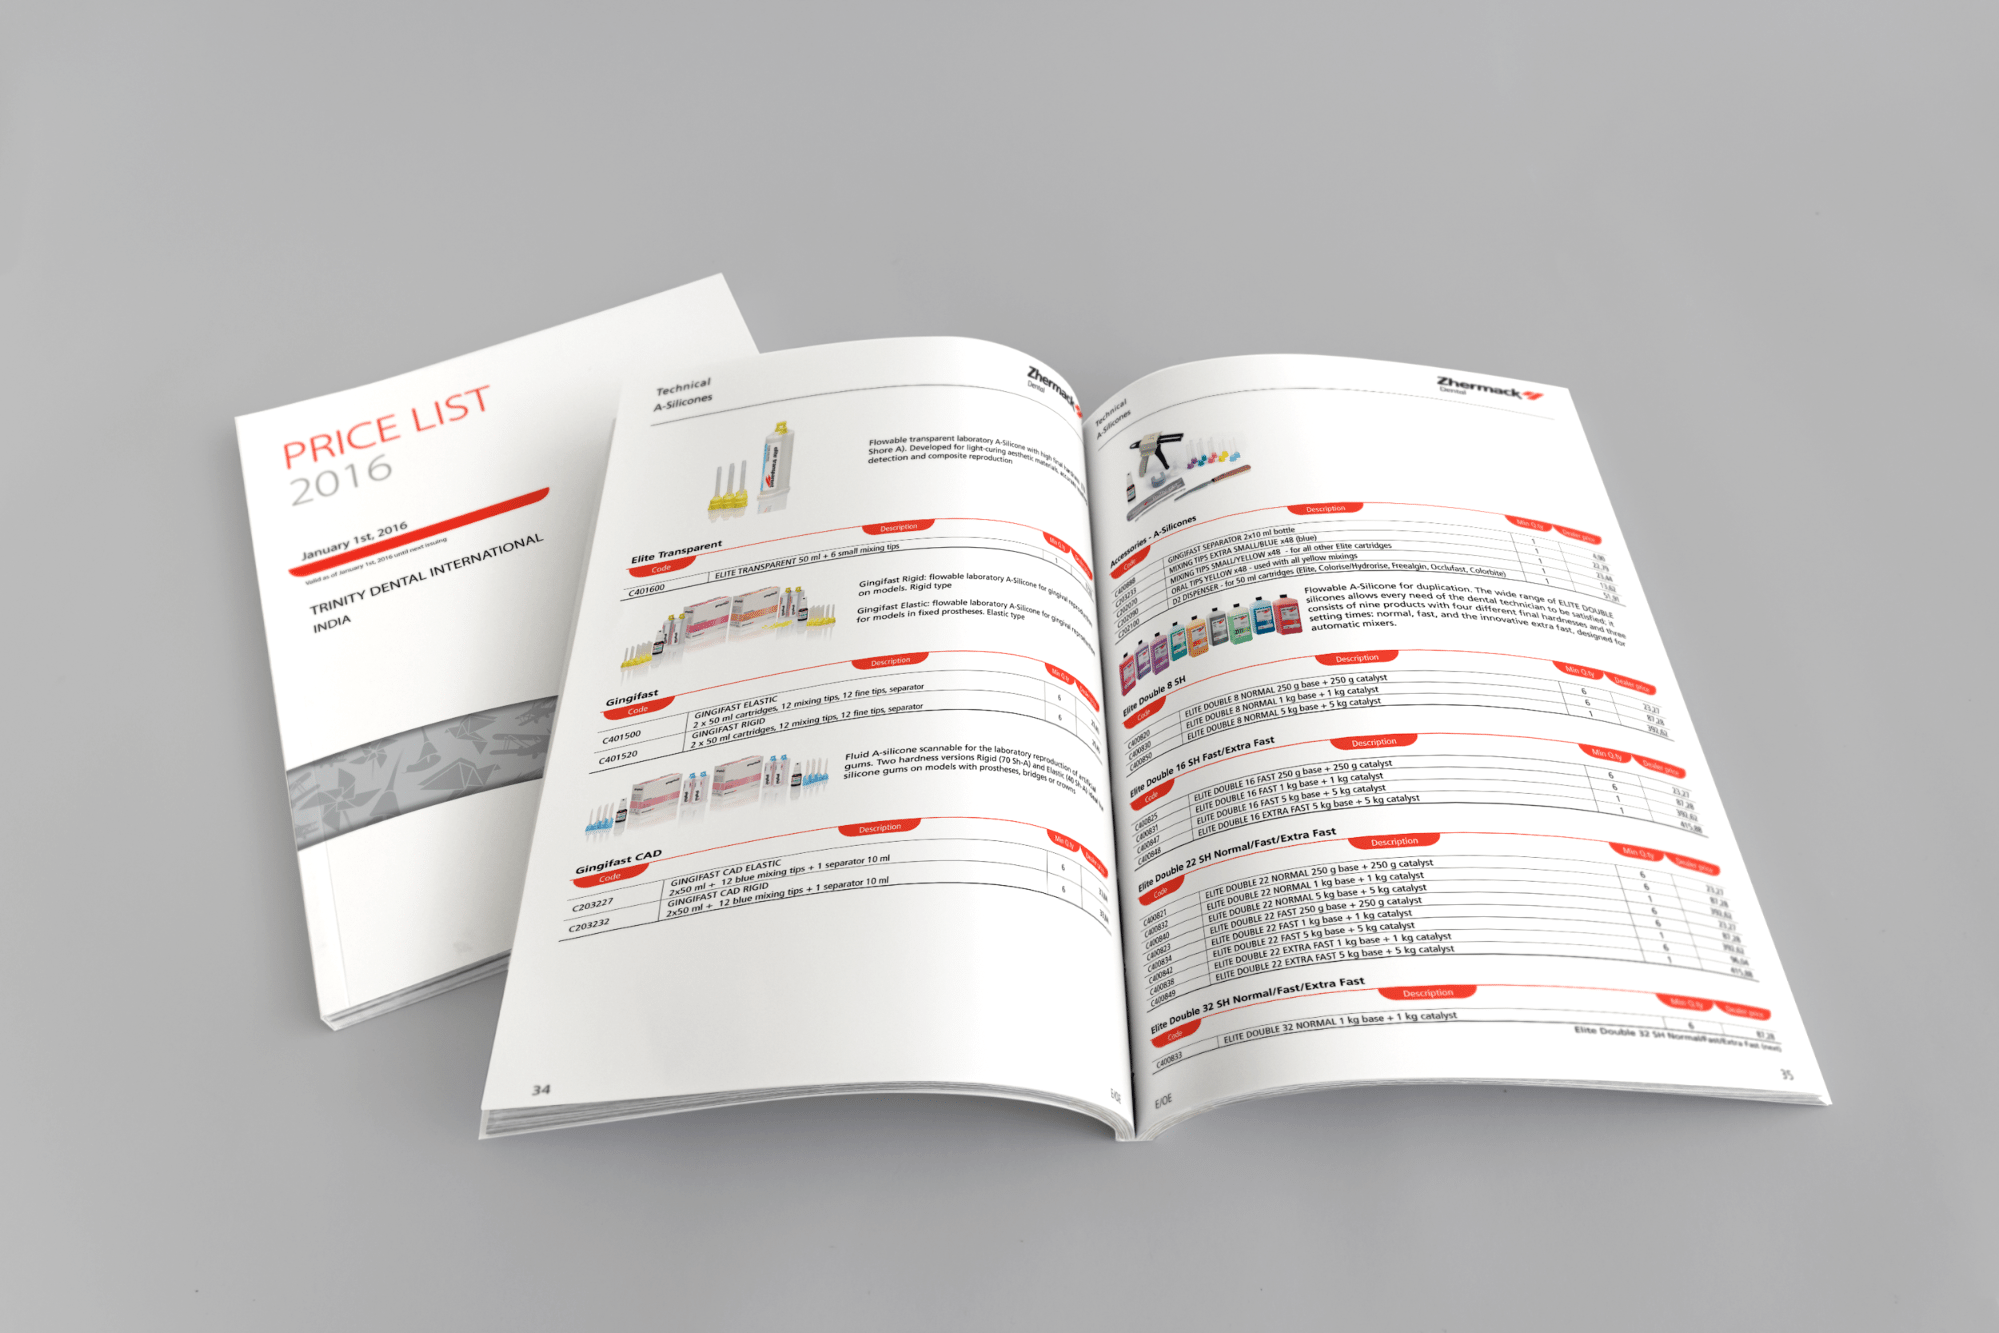
You can also create catalogs with InDesign Data Merge. Not only this, it allows you to create price lists, weekly ads, and more. However, you might run into some indesign data merge limitations during the project creation process.
What do I need to use Data Merge?
You can need Data Merge for the following.
Data Source
By “data source,” we mean a spreadsheet that includes textual and non-textual information, such as product descriptions, images, names, and prices. To import a data source to InDesign, you must follow the software’s exact import specifications.
The required import formats are .csv or .txt, and you must be sure to define all fields correctly. If you want to use your data source file such as a simple Excel that you are already handling or a file exported from a business application, read this.
InDesign Layout
This is the layout into which your information will be inserted. You can automate multiple layouts from scratch or can use one of our free-to-download templates.
Data Merge InDesign Tutorial for Adobe InDesign 2024
Download the free project template:
To help you learn and practice Data Merge, we provide a free working template. Download it from the button above. In your downloaded zip file, you will find the InDesign template and the data source in .xlsx, .csv, and .txt format.
Preparing the data source
Let’s start by preparing the data source. You need to prepare a spreadsheet (CSV or TXT) following the exact specifications of Data Merge for InDesign. Click here if you want to use a simple spreadsheet (Excel, CSV, XML or export from your business application).
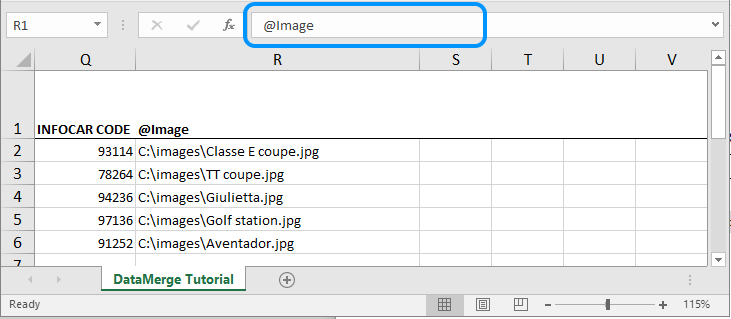
Open a blank spreadsheet and use the first row to define your fields. Be sure to write the field names correctly. Add a field for every column, and never duplicate a field name.
It is important to define image fields with the @ symbol prefix (e.g. @Image). The @ symbol is a special character in Excel. Therefore, add an apostrophe before it if gives an error (e.g. ‘@Image). The apostrophe will force the cell’s entire content to be considered as text.
When all of the fields have been defined, the next step is to populate the table with your records. Take care to make all image paths match your file system, for example.
On a Windows system – C:\Users\UserName\My Documents\Image.psd
On a Mac system – Macintosh HD:Users:UserName:MyDocuments:Image.psd
The populated table should next be exported as either a comma-delimited file (.csv) or a tab-delimited file (.txt). The Data Merge function won’t work with .xls/.xlsx or alternatives! Perform the export in Excel by using File > Save As.

By exporting the data source as a .csv file, you’ll have to choose the encoding. If you’re using Libre Office, we suggest choosing Unicode UTF-16 encoding to display special characters correctly.
Now close your spreadsheet and open InDesign.
Converting .xls into .csv/.txt
Conversion of .xls/.csv or .txt files can be quite complex. An Excel add-in can help you with this task.
Setting up the Data Merge panel
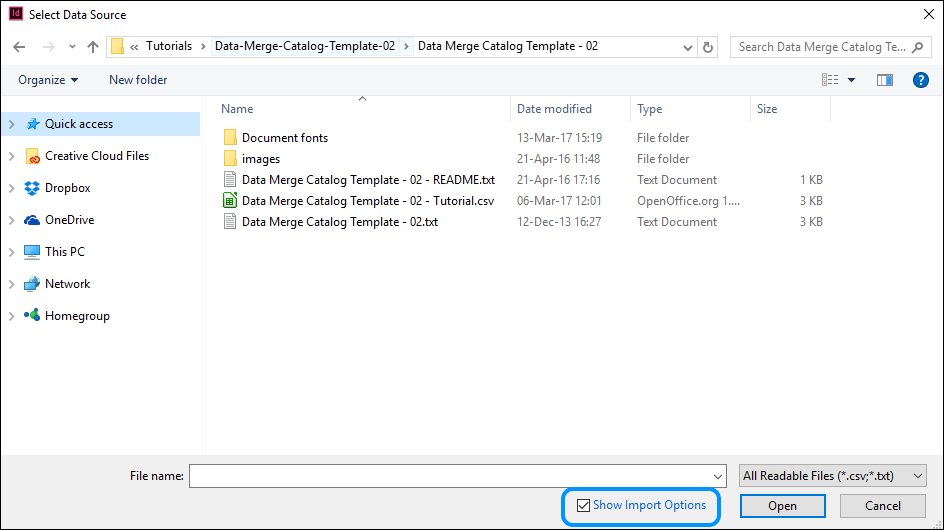
Now it’s time to set up the Data Merge InDesign panel. Open your InDesign document and the Data Merge panel via Window > Utilities > Data Merge > Select Data Source. In the new window, choose your .csv or .txt file and click Open.
Optional: You can change the data source import options by checking the “Show Import Options” box (shown below).
Now, click “OK” and take a look at the new dialogue box that appears:

The window already shows the right settings based on your data source properties. Remember, you can change these options in this box to match your situation:
- Delimiter – Choose “Comma” if you saved your data source as a .csv file. Choose “Tab” if you saved your data source as a .txt file.
- Encoding – Choose whether the file uses “ASCII” or “Unicode” encoding. Pay attention to the choice of the encoding. If you open a file that uses ASCII encoding with Unicode, the Data Merge panel won’t be populated with any fields. If you open a file that uses Unicode encoding with ASCII, the file will be imported, but some of its characters may not appear correctly.
- Platform – Choose “PC” if you’re working on a PC. Choose “Mac” if you’re working on a Mac.
- Preserve Spaces in Data Source – Check this box if you want to keep all extra spaces within your fields.
Click on “OK” once you’re finished. The Data Merge panel will now fill with all of the fields from your source file:
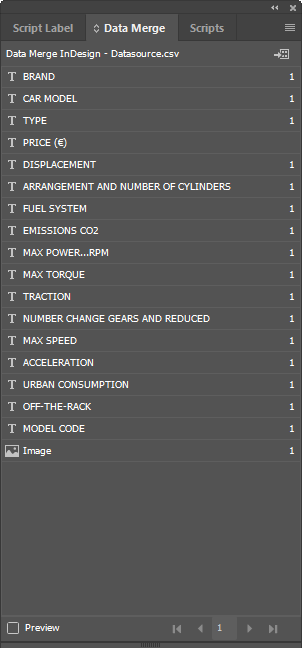
InDesign has identified two field types in our catalog example: text () and image ().
Mapping the Fields
Now, it’s time to map each field within your desired layout. Each of your data source records will follow this mapping during the subsequent automatic pagination process.
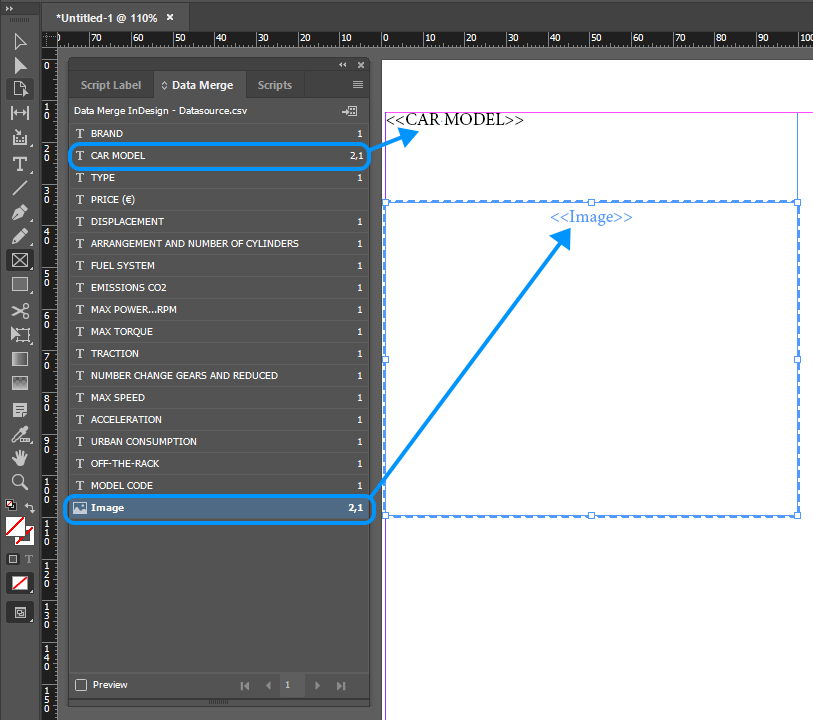
Text fields are inserted by creating a Text Frame, selecting that frame and then clicking on the selected text field in the Data Merge panel.
Image fields are inserted by creating a box with the Rectangle Frame tool (R), selecting that box and then clicking on the selected image field in the Data Merge panel.
Mapping Procedure
You can also insert the fields in the layout by choosing the field in the Data Merge InDesign Panel and dragging it into the chosen frame.
Fields that are successfully mapped will appear surrounded by << and >> symbols. Numbers will also appear next to each field. These numbers reference the page number on which each field is mapped.
To insert a field in the text of your layout, you just have to place the cursor inside the text in the desired position and insert the field using one of the above methods. The field will be inserted where the cursor is positioned.
If you don’t place the cursor, the field will be queued with the rest of the contents of the box.
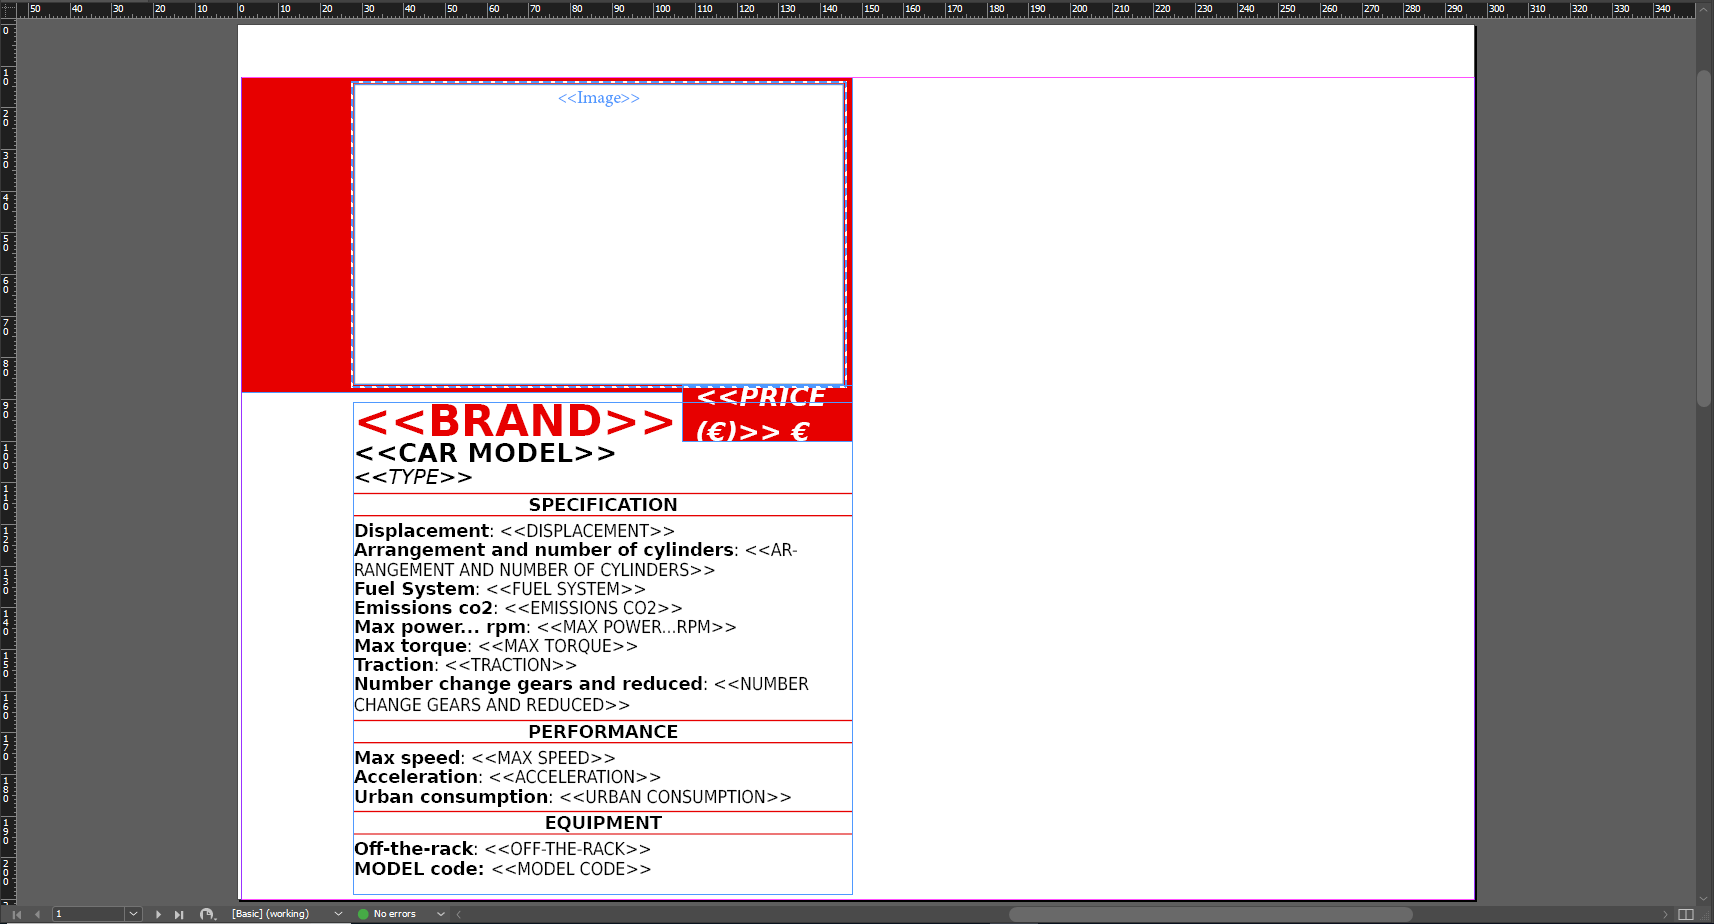
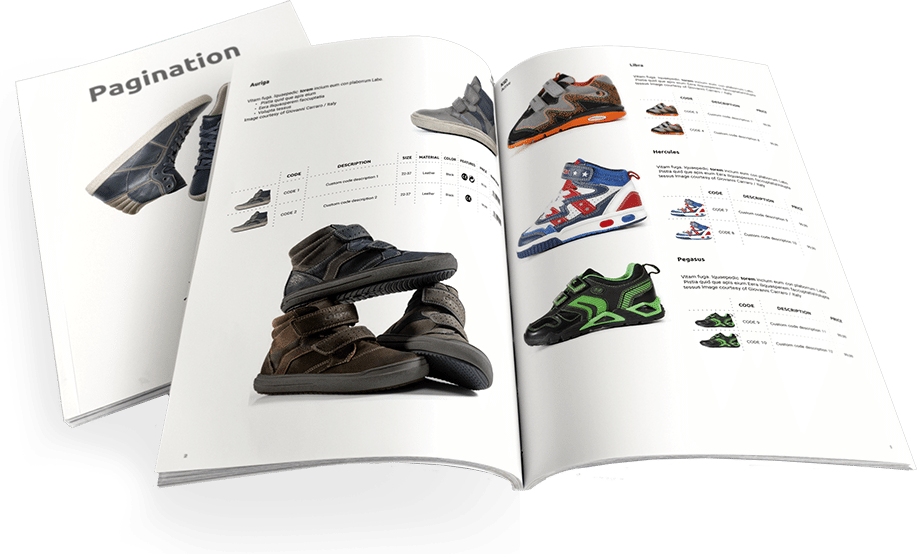
Continue to add all of your fields and customize the layout to meet your needs. Our example catalog uses a simple style: a large image at the top, a text frame with the price, and then a list of all of the other fields.
We used only one product template because, with Data Merge InDesign, it is possible to automate only one product layout. If you want to use multiple product templates, discover how to do it using Pagination cloud database publishing service. Click here to know more.
Creating the Merged Document
Finally, we’ll create the merged document. Begin the final step by clicking on ‘Create Merged Document’ within the Data Merge panel. All three tabs in this dialog box – Records, Multiple Record Layout and Options – require our attention.
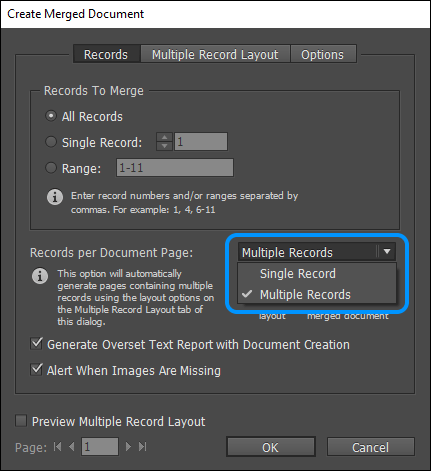
Records: This is where we choose whether to have one record or multiple records on each page.
For our example catalog,, we’ll merge ‘All Records’ and have ‘Multiple Records’ per document page.
We’ll also choose to generate an overset text report and set up an alert for missing images. These options can help us to identify issues that may occur during the document creation process.
Multiple Record Layout
This is where we establish how the records will be laid out during the merging process.

The Data Merge tool works according to page margins. This means that a record that is too big to fit within a page’s margins will be automatically placed on the next page.
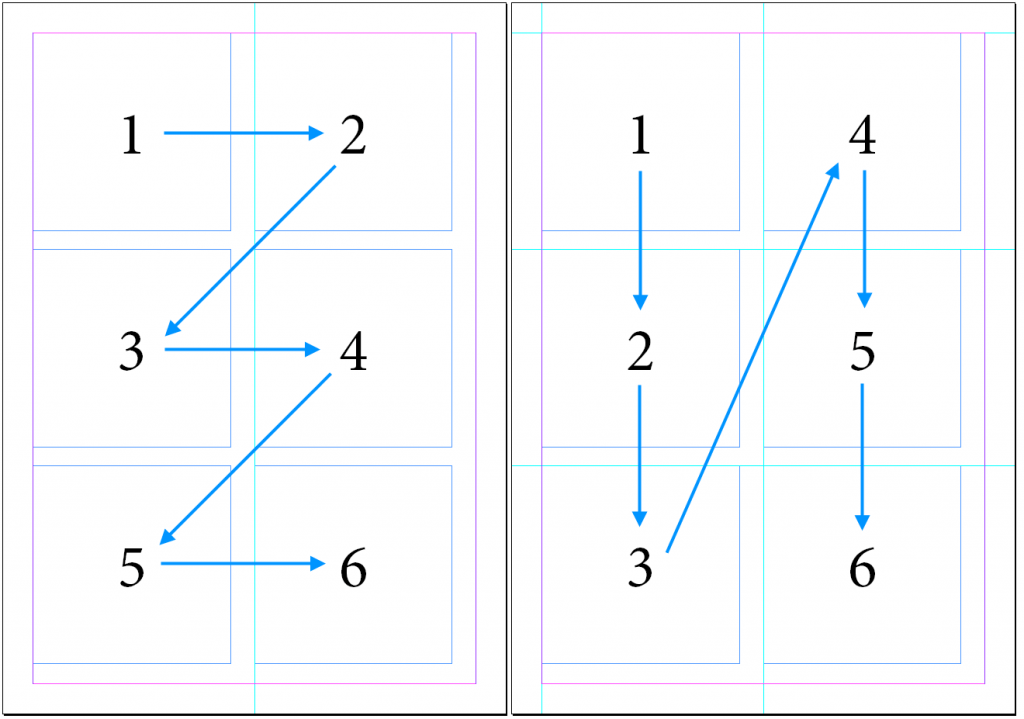
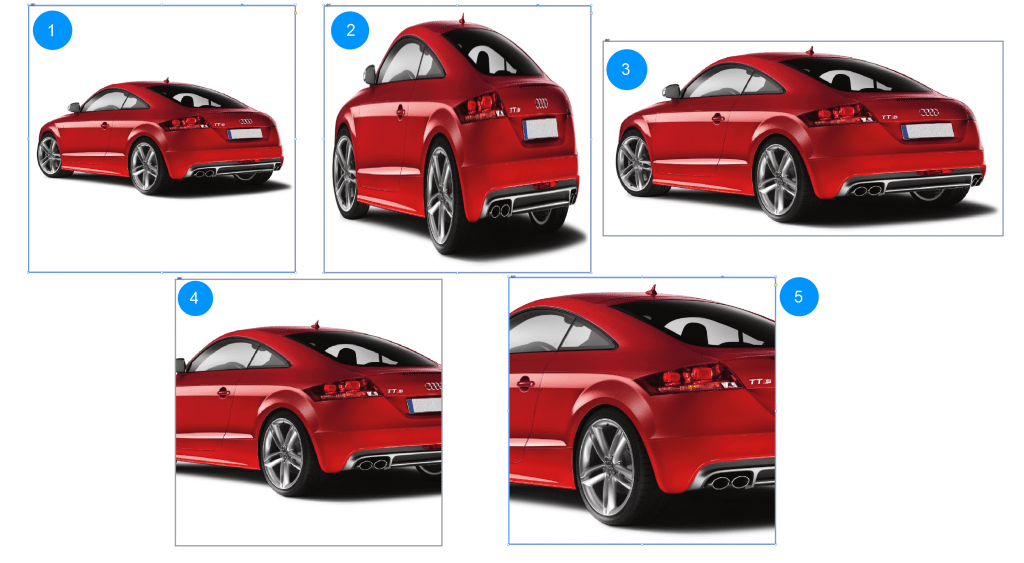
You can paginate records using one of two directions: ‘Rows First’ or ‘Columns First’. Rows First merges records left to right and then top to bottom, while Columns First merges records top to bottom and then left to right. The following image shows Rows First on the left and Columns First on the right:
Two spacing options define the distance between each record: ‘Between Columns’ and ‘Between Rows’. Setting both options to 0 will cause the records to appear attached in the final result.
For our example catalog,, we’ll choose a ‘Rows First’ arrangement with 1mm of space between the columns and rows.
Options
This is where we configure a few remaining choices.
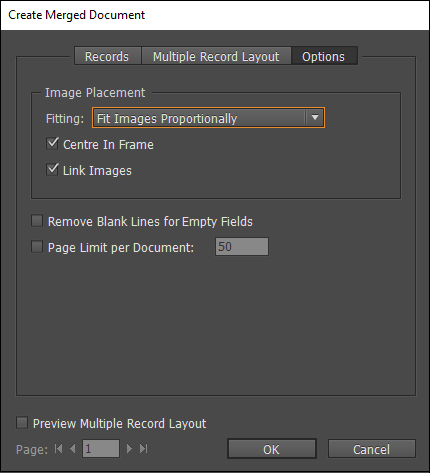
There are five options for placing images during the Data Merge InDesign:
- Fit Images Proportionally – Fit the image inside the Rectangle Frame tool box and maintain its proportions.
- Fit Images to Frames – Fit the image width and height to the Rectangle Frame tool box width and height; proportions will not be kept.
- Fit Frames to Images – Import the image with its original size and fit the frame to this size.
- Preserve Frame and Image Sizes – Import the image in its original size but do not fit the frame to this size.
- Fill Frame Proportionally – Increase image size proportionally until it has filled the entire frame.
Each option is shown in the following image:
For our catalog, select ‘Fit Images Proportionately’. Also, select ‘Center in Frame’ and ‘Link Images’.
It’s done!
Now click on ‘OK’. A new document will be created and all of the records will have been merged! If the document you want to automate is more complex, for example, you need to group different SKUs under the same parent product, or you want to break the categories/chapters automatically, discover Pagination, the database publishing solution.
Does Data Merge InDesign have any Limitations?
Data Merge is very useful for creating simple projects with repeating layouts. Learning to use this feature is quite easy, even for InDesign newbies, and it allows users to create complete documents in a short time. Data merge can be a valuable first step to optimize your document workflow, increasing its efficiency and accuracy.
If your intention is to go further along the path of document automation, you could encounter some of the following limitations that are frequently mentioned by users who try to use data merges in real-world document creation. You will find the limitations of Data Merge InDesign in the below paragraph.
If your goal is to create a perfect document, you need to find out how to use a product catalogue generator such as Pagination. It’s the perfect tool for the creation of catalogs and price lists, so much so that it is defined as a catalogue maker or a price list maker. With Pagination, you can overcome the most common data merge limitations and make the publishing of your data accurate, fast, and flexible.
Data Merge Limitations
Multiple Product Layouts
Data Merge Limitation
A product layout is the element that you will repeat inside the page. With standard Data Merge InDesign, it’s not possible to use multiple layouts for your products mixed in the same document. You can only use one type of product style per page.
Pagination Solution
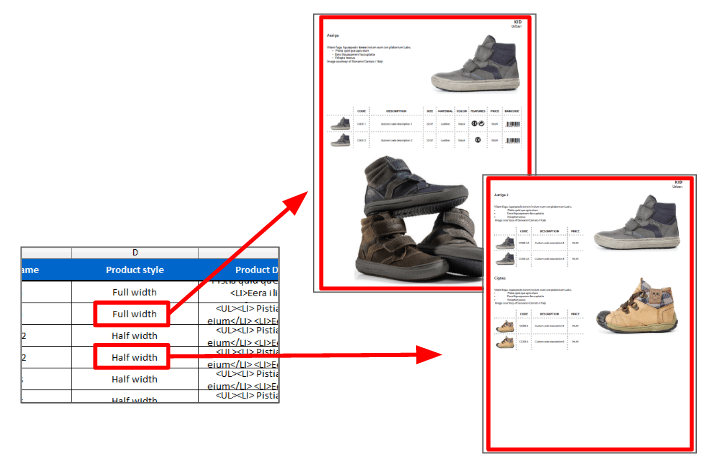
With Pagination, you can assign different layouts to different kinds of products. Click here to download the project files (InDesign + PDF + Excel) of the document you see in the image below.
Product Grouping
Data Merge Limitation
You cannot merge multiple data rows inside the same product layout. Your document is merged with one design for each record. This is a major obstacle, as most documents group together products with minor differences. This is a very common occurrence in many documents.
Pagination Solution
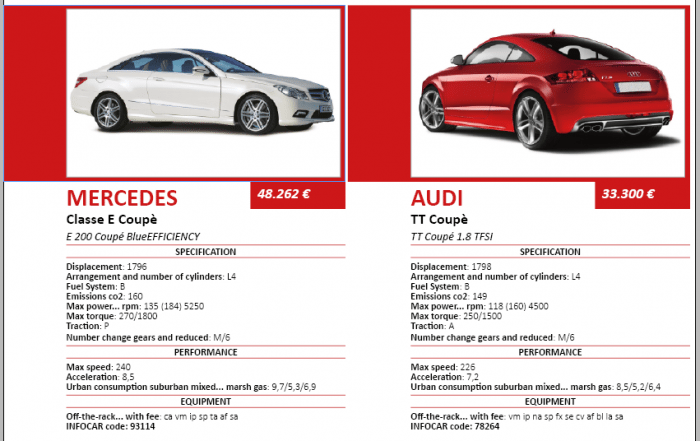
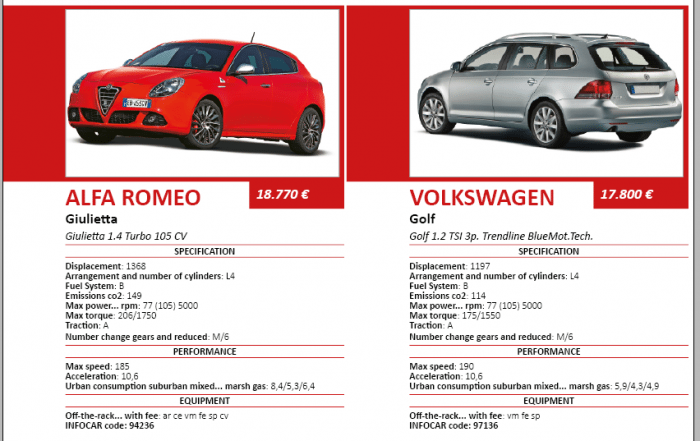
With Pagination, it is easy to group similar products and describe shared features, like name, description, and image, in the upper part of the product style and explain the differences in easy-to-read tables.

Tasks Concatenation or Batch Operations
Data Merge Limitation
InDesign Data Merge cannot automatically create a print-ready document, adding static or dynamic pages in the same workflow. You have to close and export the document manually.
Pagination Solution
With Pagination, you can create in one command finished, ready-to-print documents, which include:
- Cover pages
- Tables of contents/indexes
- Introduction pages
- Section separators
- ADV images
- Any other static pages in the selected position
Multiple Paragraph and Character Styles (HTML tags)
Data Merge Limitation
With Data Merge InDesign, you cannot choose to change the text formatting of selected parts of a field. You can merely change the entire field formatting, and this is often prone to something called “style contagion,” where adjacent paragraphs or text styles override each other.
Pagination Solution
Use HTML tags in your data to emphasize a single word or phrase.

Variable Master Pages Data
Data Merge Limitation
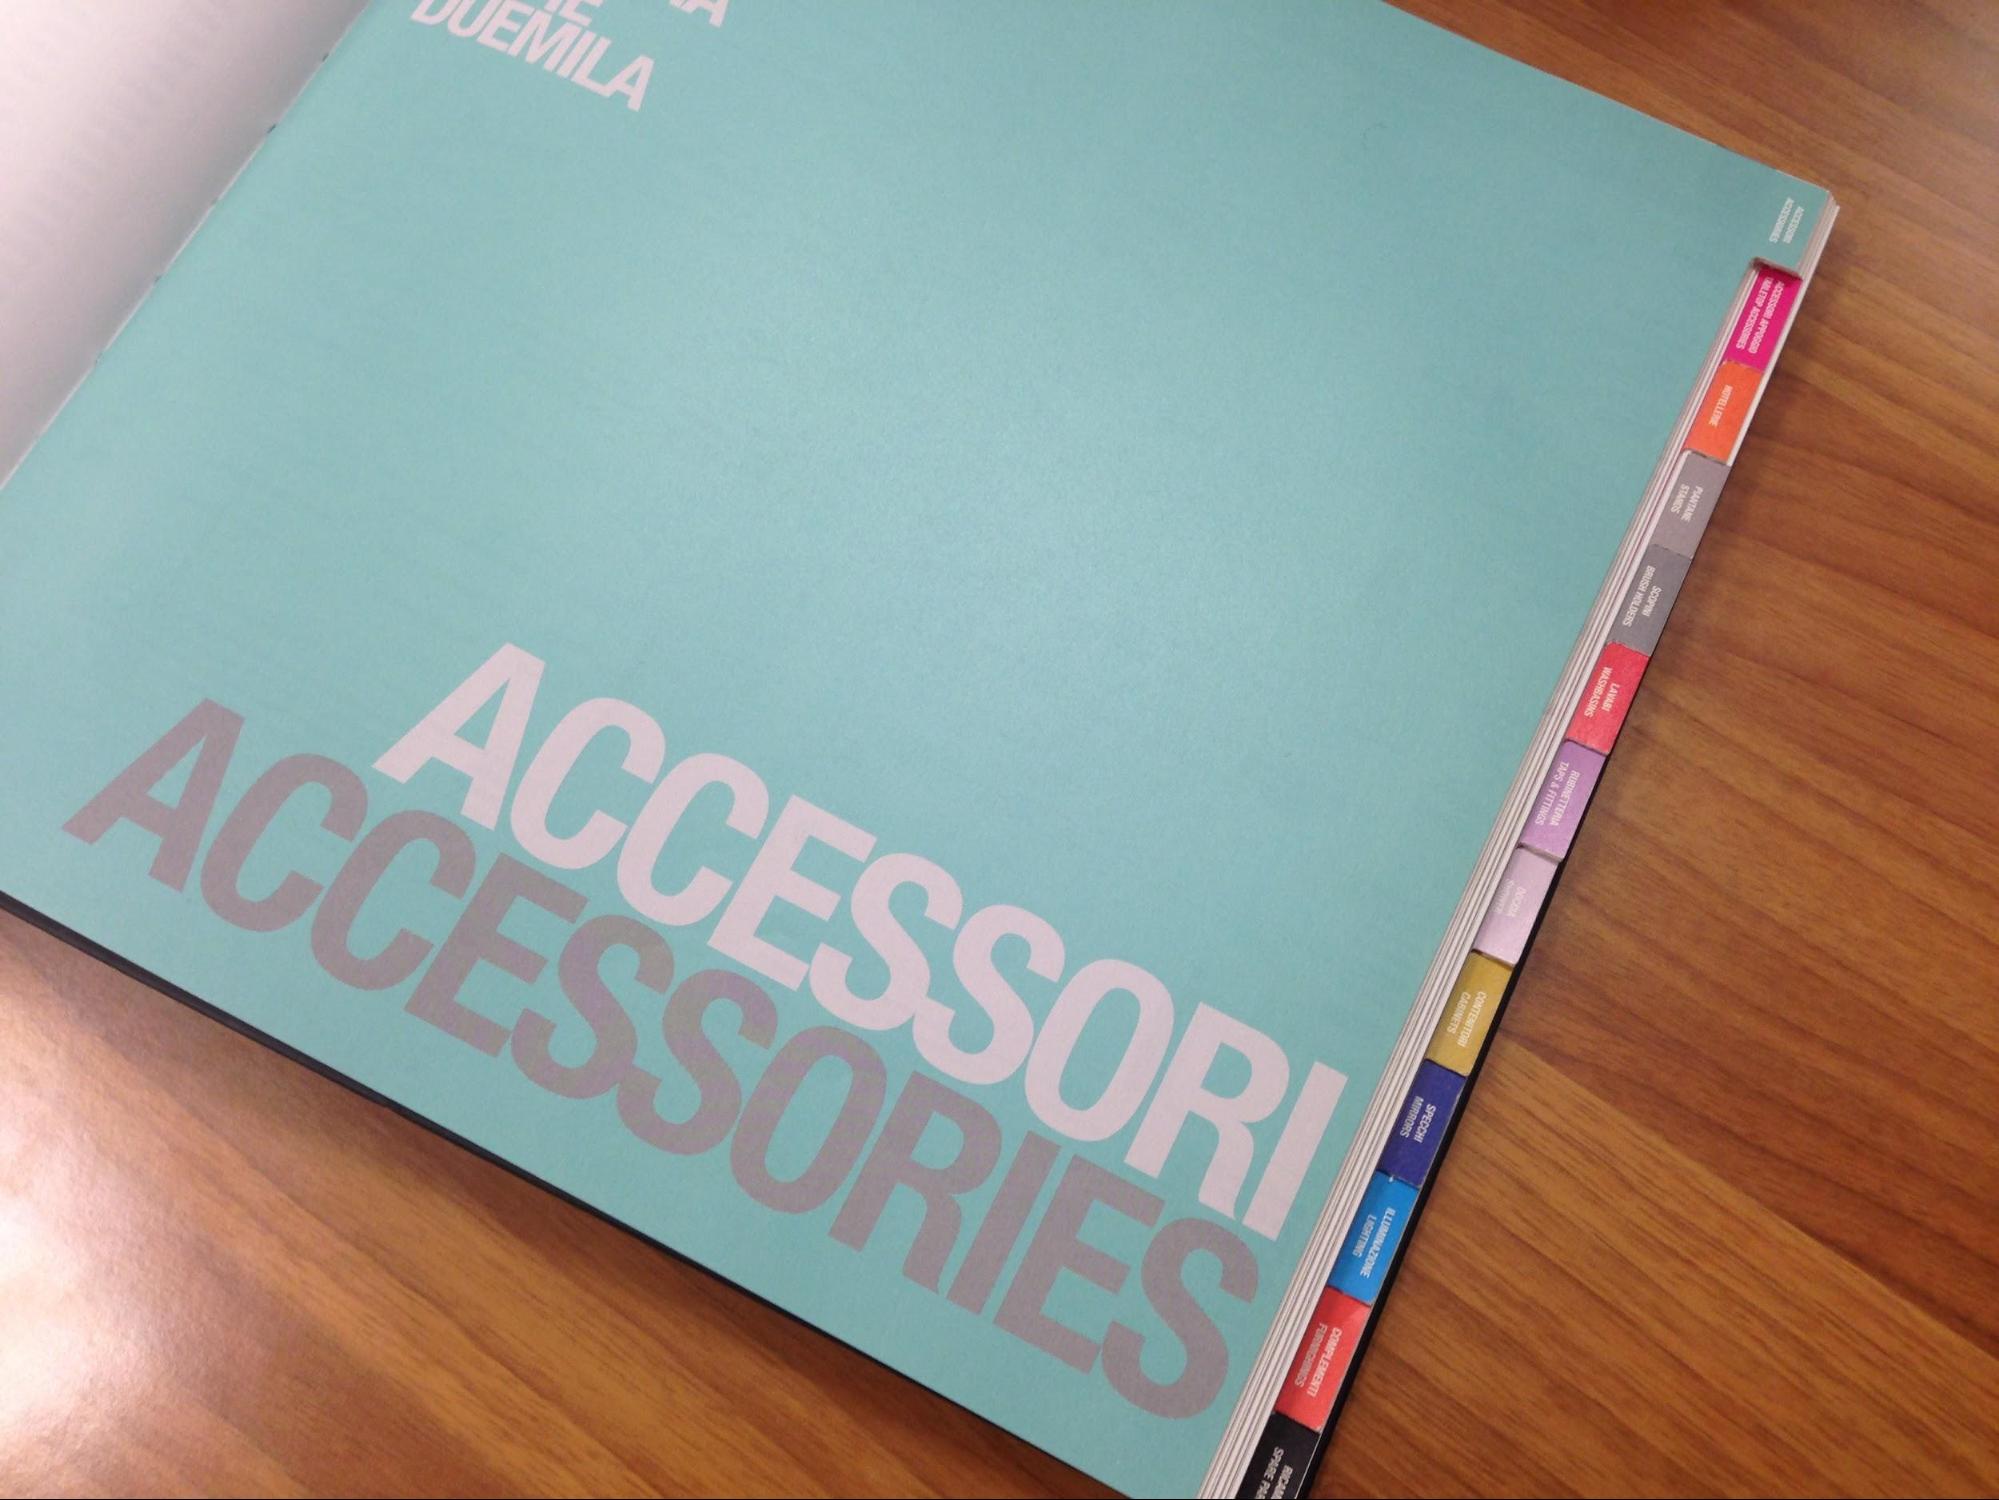
Data Merge cannot create or edit header, footer, or thumb indexes.
Pagination Solution
With Pagination, you can easily assign a part of your data (such as groups or notes) to show on page headers or footers.
Ex.1 – Header and Footer Update
Ex.2 – Chapter Color
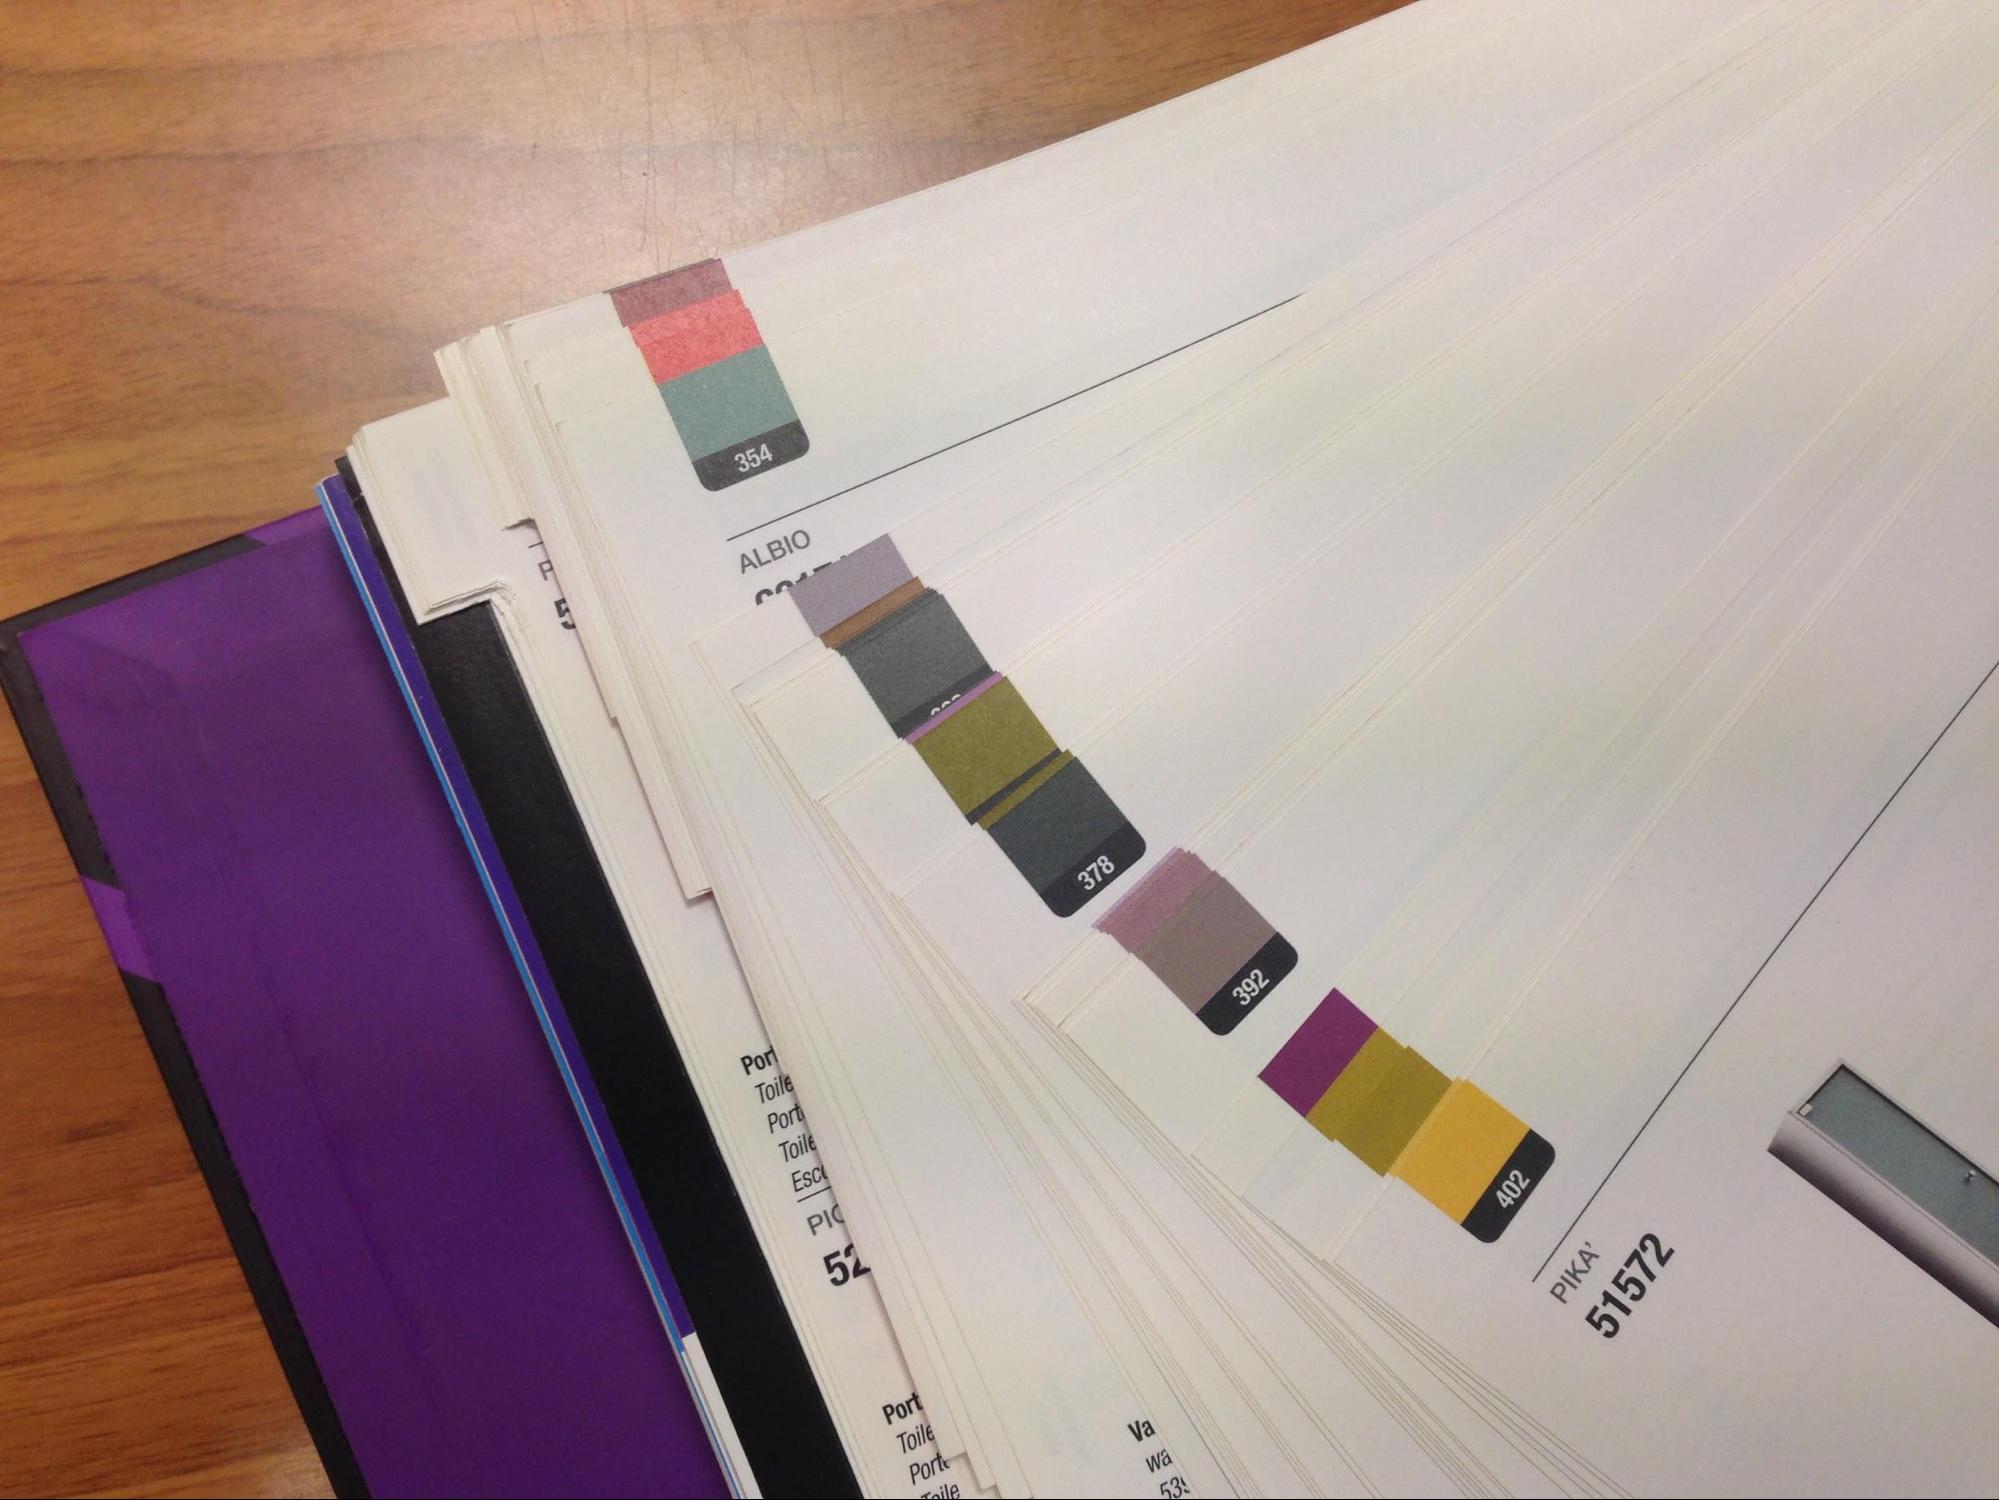
Ex.3 – Thumb Index
Page Breaks at Category Change
Data Merge Limitation
With Data Merge InDesign, it is difficult to break a document’s elements when needed.
Pagination Solution
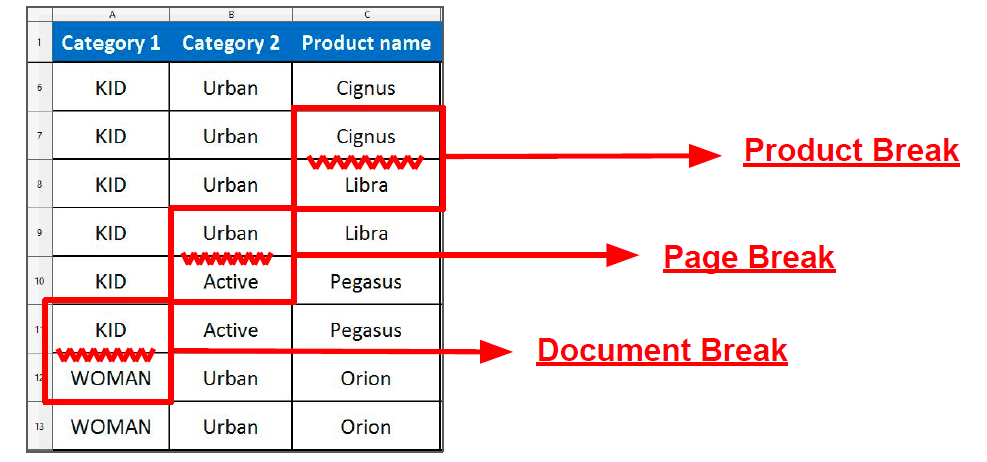
With Pagination, you can assign specific rules to insert breaks when your data changes: breaks, page breaks, and document breaks.
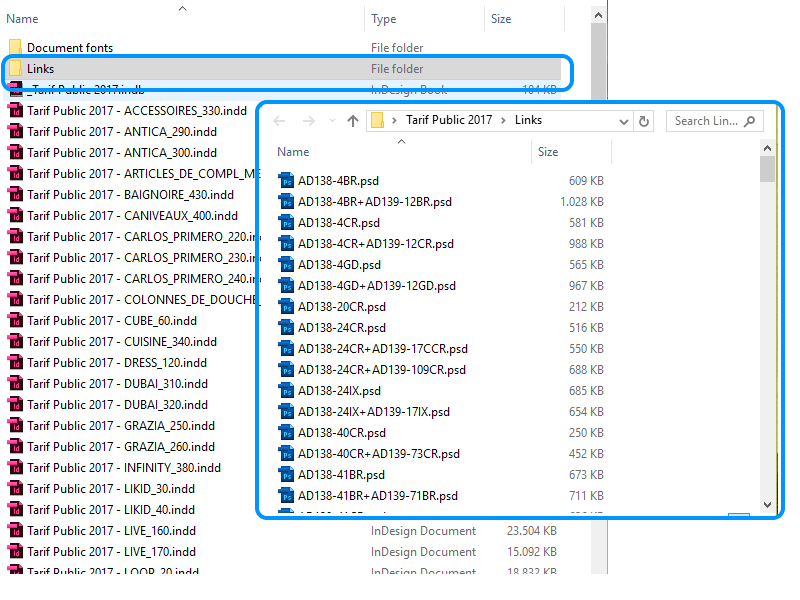
Incomplete Package Export
Data Merge Limitation
When you create a document using Data Merge, you cannot export linked graphics with a package command.
Pagination Solution
Documents created with Pagination are easy to share and use for collaboration. Linked graphics are located in a folder inside the package file, or you can choose to export to an IDML format.
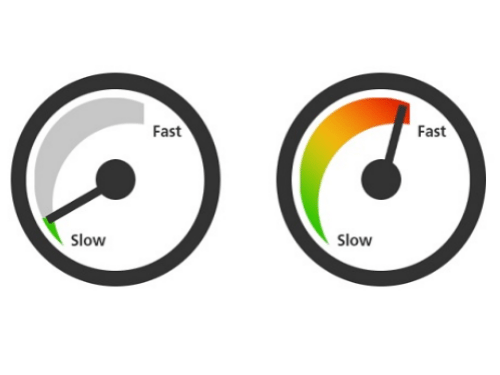
Handling Large Datasets
Data Merge Limitation
Data Merge InDesign process times rapidly grow when you manage large datasets instead of small datasets.
Pagination Solution
Pagination’s process times grow proportionately independently of the data amount, and you can split the creation of large documents into multiple parallel instances.
Data Source Formats
Data Merge Limitation
Only .csv and .txt files can be imported.
Pagination Solution
Pagination supports several data source formats (in addition to .csv and .txt), such as:
- Excel
- XML
- SQL
- ODBC Drivers Connection
- And a number of business applications (SAP, AS400, Microsoft Dynamics, etc.)

InDesign or InDesign Server?
Adobe InDesign Server is far less known than its desktop alternative. In this article, we outline what It is, when to use it, and why and how It is different from Adobe InDesign Desktop.
More Templates
Data Merge is a very useful InDesign function. Here, we list five tutorials, each one focused on the creation of a different kind of document.
Data merge is the InDesign function that allows you to connect a spreadsheet to an InDesign file and automatically populate tagged fields. It is a time-saving function if you need to create repetitive documents where the layout is static and the information changes.
To successfully create documents with Data Merge, there are many steps to follow.
The official Adobe InDesign guide is almost too thorough and can be a little intimidating, so here is a list of tutorials, each focused on creating a different kind of document.
Each of these tutorials showcases interesting and sometimes unusual uses of Data Merge.
On this page, you’ll discover how to use Data Merge to create:
How to use Data Merge InDesign to Create Business Cards?

One of the most common uses for Data Merge is to create a business card. In a company with many employees, it is essential that every business card produced has the correct layout. This tutorial teaches you the basics of successfully creating a merged document. It is available both in video and text format, and it is part of a series where you can also learn the basics of Adobe Illustrator.
How to use Data Merge InDesign for Infographics?
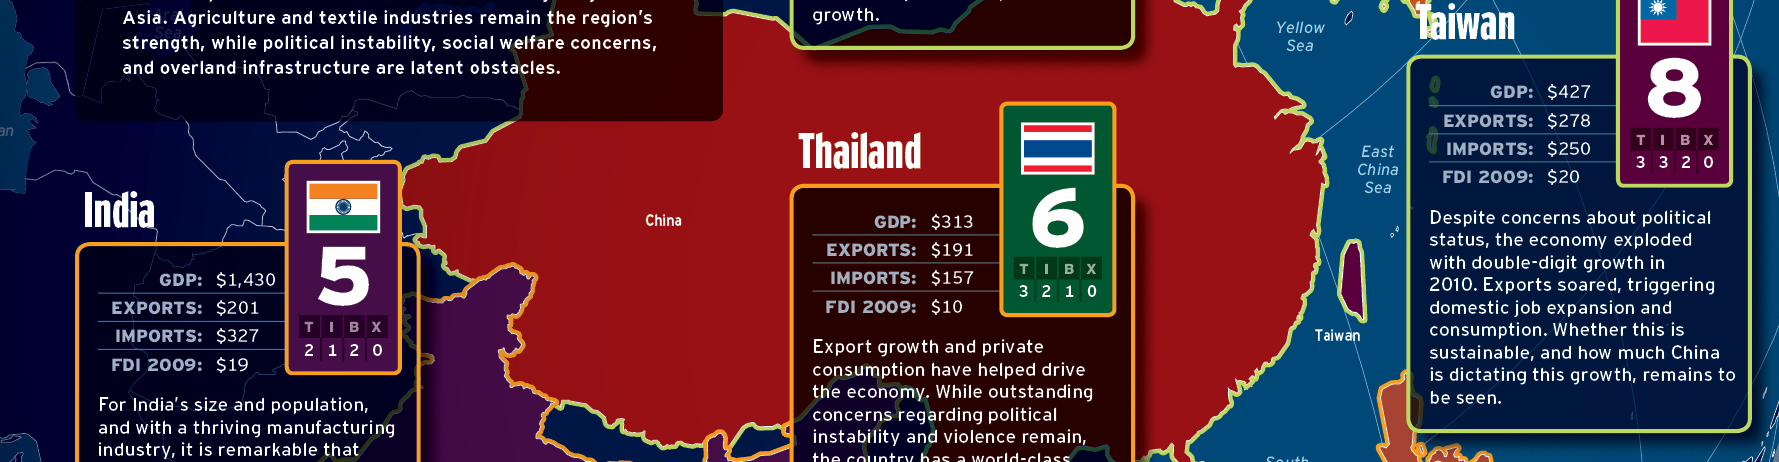
Creating infographics can be very time-consuming; they are often data-driven, and the initial form of the data is a spreadsheet. In this tutorial, the author uses Data Merge to automatically create elements containing data that he then will use to create an infographic page for a magazine.
This approach to Data Merge is very eye-opening. Usually, Data Merge is used to create end products; here, it is used as a tool to create pieces of a bigger puzzle easily.
How to use Data Merge InDesign to Create a Planner?

Why buy a planner when you can make one yourself? This video provides a very detailed tutorial on creating a planner from a spreadsheet. It also provides an example of combining Excel and the Data Merge function of InDesign.
It is especially useful to see how the author laid out the InDesign document that is going to be automated and how she organized the spreadsheet.
How to use Data Merge InDesign to Create Communication Tools?
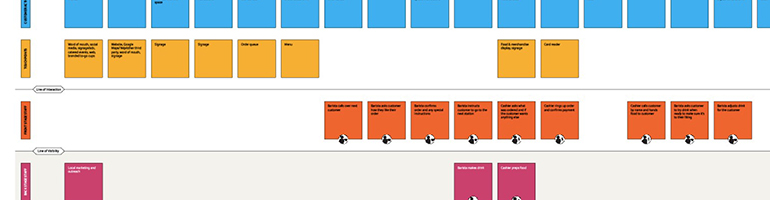
This tutorial shows an interesting approach. The author is an employee of a creative agency which uses Data Merge to create presentation-worthy documents to showcase their ideas and process.
In the design field, presenting ideas in the right way to the clients is the key to successful partnerships. Often, ideas and processes go from sketchbooks or whiteboards to a spreadsheet, so why not go a step further and also create beautiful documents?
Data Merge InDesign for Personalized Envelope
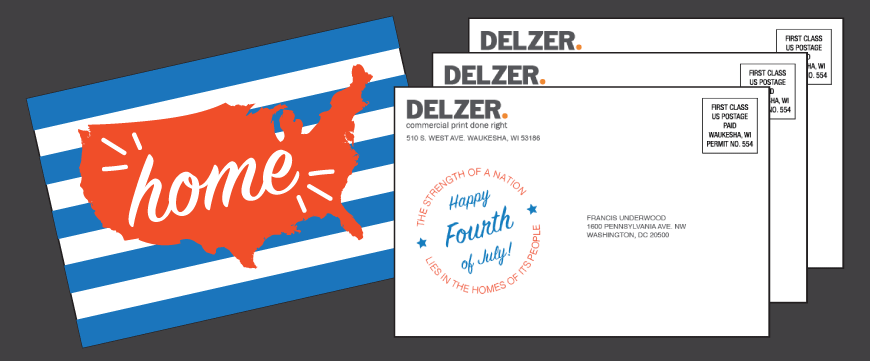
This tutorial focuses on one of the most common uses of data merge: personalizing envelopes. The process is well-documented, complete with screenshots for each step and clear explanations. Additionally, it offers numerous tips to avoid errors. However, this tutorial does not cover how to import images with data merge.
Special Characters for Playing Cards with Data Merge InDesign
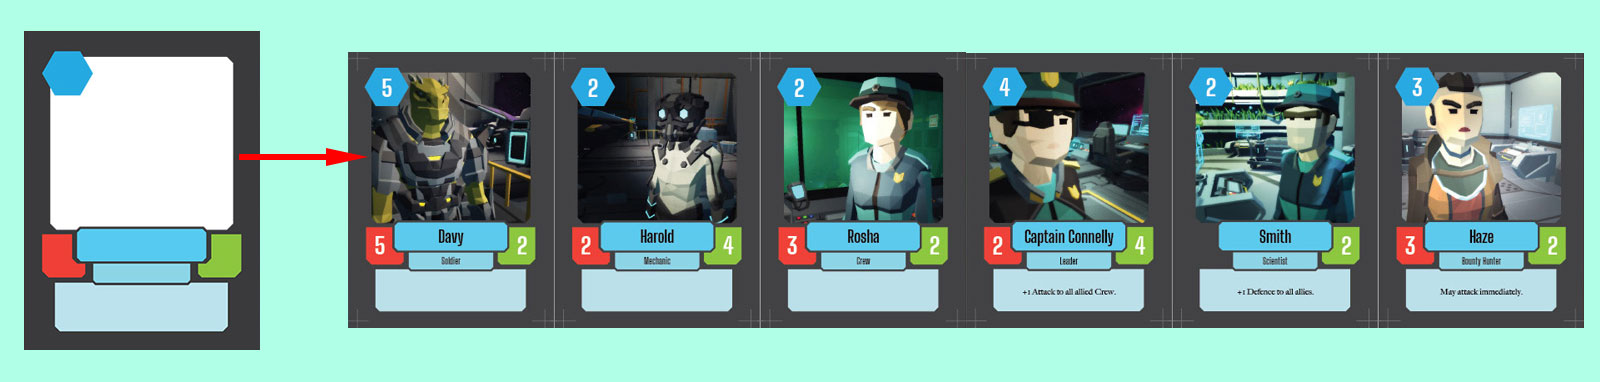
This tutorial focuses on the specialized production of character cards for card games. It offers a comprehensive, step-by-step guide emphasizing how to manage dynamic graphical elements. Additionally, it provides valuable tips for printing the exported document.
Real Estate Flyers with Data Merge InDesign

This Real Estate Flyer Template is available for download and easy editing to create modern products for clients. The template, suitable for pre-production, supports a multifunctional layout for quick customization, especially with text areas and vectors created with InDesign Effects. It’s available in A4 (210 x 297 mm + 5 mm bleeds) and US Letter (8.5 x 11 inches + 0.196 inches bleeds) sizes.
Resources
When Things Go Wrong
Approaching the data merge for the first time can lead to errors due to the many factors involved. This article presents the most common errors new users can encounter and how to solve them.
Insert QR Codes

A hidden feature of InDesign’s data merge is the possibility of automatically creating QR codes. This article explains how to do it, starting with the correct formatting of the data file. QR codes can point to a URL or set up an email message with recipient and subject.


Most mentioned InDesign Data Merge Limitations
To overcome these limitations, try Pagination – The Database Publishing Service that allows you to create data-driven PDF and InDesign files in a jiffy.
 WATCH DEMO